I had been planning for a long time to give back to the community, but feeling less confident to avoid sharing misinformation or unverified knowledge, I chose to work on my skills and myself even more before sharing with others. Additionally, due to less time and energy, I am starting this very late, but nonetheless, finally I am here to start writing my own blog. I will try my best to share my learning, experiences, and tech journey. Hopefully, I will have enough energy to keep writing more and more productively. If you want to know about me, please visit the About page.
Lets begin with Secure Coding Series in Python. I have planned this especially for you, for beginners, because I could not find many beginner friendly resources online that teach foundational level secure coding concepts especially in python. There are plenty out there, but most are a little advanced. I am starting this series to give you the basic concepts along with practical code and mini projects, and we will try to build the hackers mindset, so in the future you will be better prepared to take further steps in writing secure code or breaking it (I mean cybersecurity perspective). Now without wasting any more time, lets dive in.
Note! I will be using AI sometime to organize my content, remove grammatical mistakes (Cause English is my 4th language), and make things present in more organized way. But that doesn’t mean I use AI to write the blog for me. No!! The content is my own, and I will be sharing my own knowledge, learning, references, external blogs or books as references.
With this post I am starting a 3 Month Beginner Friendly Secure Coding Series in Python (12 weeks max plan). In this series, I will be sharing the basic things I learn about secure coding, best practices, and basically my whole journey as I go through it which I am still focused and learning. Just to set expectations, this won’t be an active course with live classes and sessions. What I will actually be doing is sharing my personal learning process week by week. That means you will see my study plans, the concepts, code examples, mini projects I pick up, and the way I practice. Along the way, I will also post code snippets, installations, commands I run, and whenever it feels useful, I will explain the code and include screenshots of outputs and steps too. The idea here is not to dive super deep into every single topic or explain every line of code in detail. If their is any need of external topics then their will be mentioned to visit. I hope this makes the series both easy to follow and helpful for anyone else who wants to start exploring secure coding without feeling overwhelmed, by reading lengthy complex books, articles or tutorials.
Who is this Series For?
This series is simple for everyone who has an interest in tech, mostly on the development side, and a high interest in coding, security, and especially secure coding, which is highly important to learn if you are a future programmer. It will be at a fundamental level, so if you are already experienced, it might feel a bit boring at first because we will start from the very basics. We will begin with Python fundamentals and then gradually move toward advanced topics, while also studying security concepts along the way.
By following this series along with me, you will learn the basics of Python and the essential skills needed to develop secure and resilient Python applications. Since this course is at the foundational level, you will also gain a general understanding of secure coding concepts, before moving toward more advanced coding and security practices.
Pre Requisites + some important Points!!
- Basics of Python or any programming language.
- I use a Linux environment, I would recommend you also install Ubuntu or Kali Linux in a Virtual Environment (optional). But if you are comfortable with Windows or Mac, no issue, you can continue. You will not face any big issues because we will be using
VS Codeas the code editor, you can use any other alternative editor. - Learn the art of the internet, you need a good grasp of how to Google any error, how to find tutorials on YouTube, and how to ask questions. Overall, I mean you need skills to solve your own problems. I will not dive deeper to explain every single topic, using Google will help you a lot.
- Yes… interest. and another important thing is that if you have already cleared your basics of coding languages like Python (which we will be focusing on), that would be a plus point. And if you are a complete beginner, I think you should take some basic classes on YouTube or W3Schools (free) and then come here. Why? Well, I will not be covering the absolute basics like deeply explaining variables, data types, functions, etc.
- I will be just sharing highlights of what’s going on in day 1, 2, and so on, just a few paragraphs, few codes, and 1 project per week. But that doesn’t mean that oh that’s easy!!, we just need 2 commands to run on day 1 and then move to day 2, and same for week 1 and week 2, and so on. Noo, I would advise you to clear all your basics and not move until you have good grasp. Because if you do clear your basics and clear your concepts on the topic, then everything will be easy for you in your future coding journey, not just limited to this course.
- We will be following for first 4 weeks a book
Designing Secure Software A Guide for Developers by Kohnfelderthroughout our journey. This is completely optional and we are just following it to build some high level concepts. how things works in software development, considering security, do’s and don’t. - If you have any kind of question, you can reach out to me on LinkedIn or you can ask on our Discord server.
Course Content
-
Weeks 1-6: We will cover Python basics along with a mini project, breaking code, fixing it, and building a hacker mindset.
-
Week 7: We will cover the basics of the Flask and Django frameworks in detail, along with practical building of Flask and Django web applications.
-
Week 8: We will cover the OWASP Top 10 and secure coding principles in detail.
-
Weeks 9-10: Our code analyzes work will start from here. We will cover practical Django code review and replace vulnerable code with secure code. Basically, our main focus will be on OWASP Top 10 vulnerabilities.
-
Weeks 11-12: Once we build the foundation of how to spot and write secure code, in these two weeks we will do CTF style hacking of a Django based web application. Additionally our series will end here.
General Motivations!!
Throughout learning to code, you will face errors and problems, and you will make mistakes in every single line. Well that’s natural, don’t be frustrated or demotivated at the very beginning. It really takes time, you can’t become proficient in just a few weeks or months. Maybe it takes 5 months, or maybe even a year or more to become fully proficient. Overall, to give you general motivation: don’t be frustrated. Instead, ask questions, practice more and more, complete the given assignments, and try harder.
Actual Start here!!
Requirements for Week #1:
- Python3 installed
- VS-Code editor
- OS - Windows / Linux / Mac (any)
Setup Environment!
First we need to setup Python in our system
- Install Python (if not already): On Ubuntu:
sudo apt update
sudo apt install python3 python3-pip
please google it, how to setup python in windows.
Check version in Ubuntu:
python3 --version
You should see something like Python 3.12.x. Mostly old programs still use Python 2 but in our case Python 3 is the latest version so it would be good to install latest version.
In terminal it looks like this:

- Install VS Code using terminal:
sudo apt install code
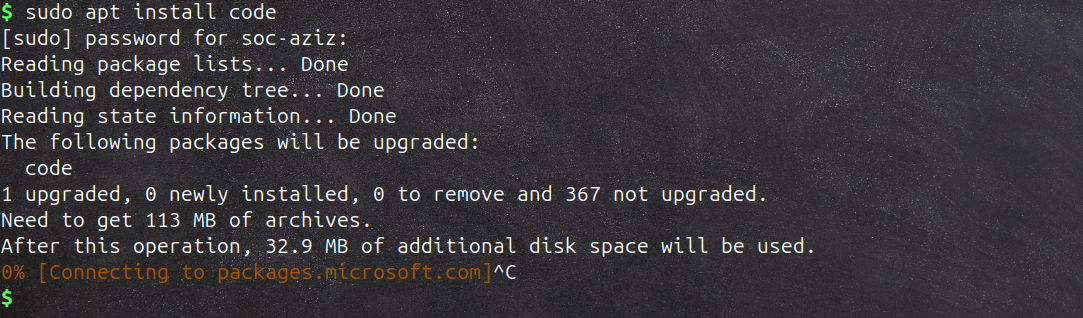 You will see something like this. I pressed
 Ctrl + C to stop it because I already have it installed. If you are using Windows, then try to install it directly from the browser, just Google: “vscode download”. Once downloaded, install it.
Once installed, now we can write our first Python hello world program.
I would suggest creating a new folder (directory) with a proper structure. Or, you can take an idea from what I mostly do.
 main directory:
 secure-coding/week1
now to run VS Code in the same directory use this command
code .
FYI: code is used for VS-Code editor and . (dot) specify current directory in linux. In windows environment right click inside the same folder and open with VS Code. It will open in the same directory.
- First Python program:
Open VS Code, create a file
hello-world.py, and type:
print("Hello, all! Welcome to Secure Coding Series.")
Python files are recognized by the .py extension at the end of the file name. Whenever you write Python code, you must add .py at the end of the file name.
Run it with:
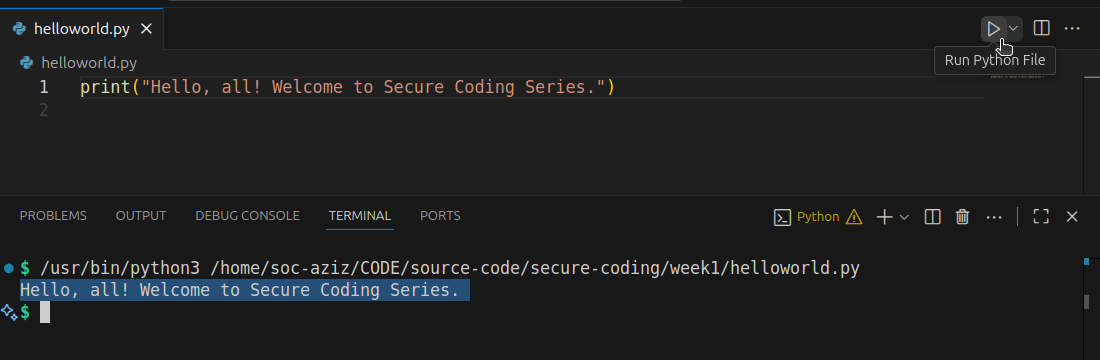
python3 hello-world.py
Output:

I am using the terminal to run Python code, but you can also use the built-in terminal in VS Code by clicking on the “Run Python File” button in the top right corner. You will see that it gives the same result as the one shown above. make sure you have python extention in vs code installed already.
 This is your first program - Congrats!
Variables and Data Types
In simple words, how to store data in computer memory?.. In Python or in any programming language, variables are used to store data values, and you can think of them as labels or names that point to information in memory. Python automatically understands it based on the value you assign. For example, if you write age = 78, Python knows its an integer, while name = "Aziz" is recognized as a string. These are called data types, In Python, data types are the kind of values that a variable can store. Every value in Python belongs to a specific data type, and it tells Python how that value should be used or handled. The most common data types you will use are integers, floats, strings, booleans, lists, tuples, and dictionaries.
int, float, string, bool, … Let’s do it practically.
# Variables in Python

name = "Aziz"
age = 78
height = 6.1
is_student = True

print(name, age, height, is_student)
- Strings = text (
"Aziz") - Integers = whole numbers (
78) - Floats = decimal numbers (
6.1) - Boolean = True/False (
True) #is used as a comment in a program. Suppose you want to write any hints without creating an error in a program, then you can use comments. In Python, you first need to write#and then write your one line comment, as I wrote above in the first line.
Now Don’t be limited to this. Play around… Do change values, print them, try different data types, try to change values and practice more.
Indentation in Python
Indentation is very important because it defines the structure of the code. Python uses spaces or tabs at the beginning of a line to indicate a block of code. For example, in loops, functions, or conditional statements, you must indent the code inside them. If indentation is not done properly, Python will show an indentation error. example:
if variable >= something:
    print("print this")
    print("and print this.")
In simple words, the spaces we made in the beginning of lines 2 and 3 above are called indentation.
Input() and Print() Functions in Python
In Python, input() and print() are commonly used and very important concepts for interacting with programs and both input() and print() are python built-in functions. The input() function is used to take input from the user, which means the program will pause and wait until the user types something and presses Enter. For example, name = input("Enter your name: ") this will store whatever the user types into the variable name. On the other hand, the print() function is used to display information back to the user. For example, print("Hello,", name) will show the message along with the user’s input. By combining input() and print() functions, I hope this is clear now. We can make programs more interactive and responsive with user involvement. We will study more on python built-in functions in later posts.
name = input("What is your name? ")
print("Hello,", name)
write and save this code in a python file user-input.py in VS-Code. and then run it.
 It asked for name and I put value
 Aziz in front of What is your name?and we can see the output as Hello, Aziz and who do this? the two brothers! python input and print function. (Don’t worry we will explain and learn about functions more in later posts with practical).
Now try this one:
num1 = input("Enter a number: ")
num2 = input("Enter another number: ")
print("Result:", num1 + num2)
write and save this code in a python file two-nums.py in VS-Code. and then run it.
Output:
 Notice: 3355? Do you think this is the correct answer? Well, it joins the strings, it doesn’t add the numbers. Why?
Well we were trying to write a program to add two numbers, but if you look at the result, it’s not what we expected. Instead of adding the numbers, it shows 3355 as the result, while it should have been 88. This happened because we did not specify what kind of data we wanted and what kind of data we were giving to the program. Python assumed the input was string data, so instead of adding the values, it combined them. We can fix this in the next code by converting the input into integers using int, and Python will understand that the data is in integer form.
Fixing it by converting to integers:
num1 = int(input("Enter a number: "))
num2 = int(input("Enter another number: "))
print("Sum:", num1 + num2)
the program now will just accept only integer value from user as input, if user input string value then the program will raise value error. why? because we the program asked for int data type, not string or boolean.
Output:
 If you type a string or character value instead of an integer, Python will raise a
 ValueError because we specified in the code that only integers are allowed.
Question: What if you put symbols, or a combination of integers and characters, or integers and symbols? What will happen? Try this out and see if you can break the code, and then think about how to fix it wherever needed.
Intro to If / Else / Elif Statement in Python
Here I am just giving you a short intro to if/else statements because the post is going too long, but don’t worry, we will explain them in more detail next week / next post again. Please just try your best to understand for now, and if it feels confusing then no worry, you will learn it more with time.
If/else statements are used to control the flow of a program by making decisions. The program checks a condition, and based on whether it’s true or false, it decides which block of code to run. In simple words, it’s like telling the program, if this is true, do this, otherwise do something else. We have “if” which is used to check a condition. If it is true, the code under it will run. “else” will run only if the condition is false, and lastly “elif”, also known as “else if”, allows you to check multiple conditions one after another.
Now that we have a basic idea of input, output, variables, data types, and control flow in Python (if not, go back and practice until you feel confident), Now we are ready to create a Mini Project. Mini Project??? hmmm well yes, exactly, to motivate you and make you feel more confident. So, for the first week, I have planned a mini project: Simple Calculator in Python. Don’t worry, in the upcoming weeks we will work on more complex and feature rich projects along with explanations.
Simple Calculator in Python - Mini Project
Now let we combine this week learning and make a mini project.
calculator.py
print("Simple Calculator")

num1 = float(input("Enter first number: "))
num2 = float(input("Enter second number: "))

print("Choose operation: * - + /")
operator = input("Enter operator: ")

if operator == "+":
    print("Result:", num1 + num2)
elif operator == "-":
    print("Result:", num1 - num2)
elif operator == "*":
    print("Result:", num1 * num2)
elif operator == "/":
    if num2 != 0:
        print("Result:", num1 / num2)
    else:
        print("Error: Division by zero not allowed.")
else:
    print("Invalid operator")
write and save this code in a python file calculator.py in VS-Code. and then run it.
As we have already studied about user input, we haven’t yet touched on if-else statements. We’ll go more in-depth on that in Week 2. For now, I just want to give you some motivation by writing a good project so you can get an idea of how things work. Please bear with me.
Result looks like this:
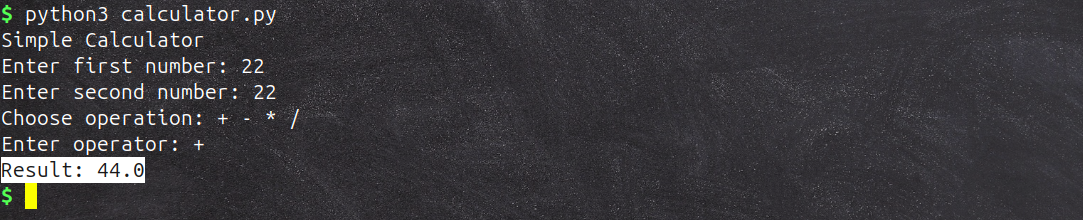 Run it and test it with different inputs. Try to break it using different operators, insert character values, or do anything that comes to mind, just try to break it. Don’t be limited to what is asked, such as ( * - + / )
The mini project is still not perfect and needs a lot more work, but for now that’s enough. We will improve the same project in the upcoming weeks to get the best ideas from it. For now, just try to understand the simple version, and that’s enough for the practical work.
Book Reading
Now before ending we will be following a book Designing Secure Software A Guide for Developers by Kohnfelder. This is completely optional and we are just following it to build some high level concepts. how things works and the book is overall about secure Softwares development mindset and high level concepts. Also you can study any other book or articles what you want.
Read: Chapter 1 Foundation (read first few sections at least, if you can’t cover all) and in Week 2 we will going to complete chapter 1 and summarize it.
Review
Now it’s time to review what we have learned. First, setup your environment, review the basic concepts of variables, data types, indentations, user input and output. Try modifying your calculator program that it keeps running in a loop until the user chooses “exit.” While doing this, run your calculator again and try to break it by giving bad input, such as typing letters instead of numbers, and see how the program reacts. Finally, make sure to take notes of what you learn during this practice, as it will help you understand and improve your coding skills double.
That’s it for Week 1. I hope it helps you and that you have gained some knowledge. I know I have not explained every step in detail, as I mentioned above, but in the upcoming posts I will try to explain as much as needed. We will also gradually move from python basics to secure coding principles, best practices, OWASP top 10 most common vulnerabilities, how to spot those vulnerabilities and creating defensive code to protect our website or application from attacks. For now, this may look difficult, but don’t worry, we will learn all of this throughout the journey. Next week, we will delve into control flow and loops in Python. If you have any questions, recommendations, or improvements, please feel free to reach out to me on LinkedIn: https://www.linkedin.com/in/aziz-u000/